Focus Home Interactive have really been stepping up their publishing efforts lately, hitting sales successes with games like Sherlock Holmes and Farming Simulator 2017. Well, their latest blockbuster effort comes from collaborating with Streum On Studio for Space Hulk: Deathwing, a claustrophobic, corridor first-person shooter. The old-school game has launched for PC, PS4 and Xbox One, and gamers looking for a little help getting through the game may find this gameplay walkthrough guide helpful.
YouTuber RabidRetrospectGames has the complete gameplay walkthrough of Space Hulk: Deathwing across a multi-part series of videos that you can check out below.
You can use the on-screen HUD to give your two comrades instructions on how to form-up and what sort of battle tactics to take. The first mission involves meeting up with Brother Gideon on the Space Hulk.
Move through the corridors toward the beacon location of Gideon. In the early goings there isn’t much of anything to stand in your way. You simply haqve to follow the trail of dead bodies and gore littering the hallways. The gore and entrails will mark your pathway. Use your teammate to bust open the jammed door to get into the room where the remains of Gideon and his crew will be discovered.
After you get to the beacon a swarm of enemies will come out and attack you along the corridor, so be ready for them. You’ll need to then head to the generators to restore the defense grid. Along the way, you’ll need to face off against hordes that will crawl out of the walls, from the vents and every other crevice. The corridors are small, so pick your shots.
Fight your way to the generator to activate the defenses so the rest of the Deathwing can join the Space Hulk and aid you in battle. Once the generators are activated you’ll need to proceed to the waypoint to secure the location. You’ll need to fight off multiple waves of Genestealer swarms before proceeding to the next objective. It’s best to get up on the platform of the bridgehead and shoot down on the countless swarms that emerge from below.
The goal in the next mission is to breach the engine chamber and setup plan to stop the Genestealers from jettisoning the Space Hulk into the void of a gravity well. However, there are Genestealers with ranged weaponry this time around and they’re all about blasting you to bits from a distance.
Continue through the map and activate the panels on the modules and then destroy them. You’ll need to do this while being swarmed by the Genestealers. Keep the heals on standby as you make your way through the corridors because they’re not afraid to shoot you in the back.
One thing to keep in mind is that it’s not a bad idea to modify your teammates’ loadouts before a big survival wave battle. If you’re going to have to defend a small area, it might be best to give one of your brothers a melee weapon. If you’re dealing with long range combatants then it’s best to equip them with the chaingun or bolter.
After disabling the engines the mission will end, and the next mission will involve placing a beacon at a designated location in order to discover the location of a Dark Angels vessel.
Make your way through the desecrated halls of the forsaken and down toward the beacon location. You’ll need to punch the wall open to place the beacon and then defend the beacon while waves of the Genestealers scrap away at what little opportunities they have to face off against the indomitable force of the Deathwing.
After defending the beacon and journeying to the next waypoint you’ll head into Chapter 3.
There’s a signal that the commanders want the squad to check out, so you’ll need to take you and your battle bros through more tight corridors toward the beacon. You can actually use the doorways as a strategic advantage, such as getting your teammates into a room and then locking the door behind you.
The beacon will lead you toward the dead body of Brother Maegon, a high-ranking epistle from 10,000 years prior from the ship the Caliban’s Will. The next task involves venturing through to find the ancient artifact from the Caliban’s Will.
There will be some mounted turrets you’ll need to take down, as well as a lot of mutant pawns of the Genestealers with project weapons. It’s best you use a bolter or a chaingun as you head toward the location to acquire the artifact. You can also hack into certain turrets and use them as an advantage, but be sure your teammates have your back while you’re hacking.
After purging the room of Genestealers, the mission will be complete and the next task will involve moving through the cathedral-like bulkheads to wipe out the Genestealer swarms.
Get to the bulkhead door locks and slam them shut by blowing out the mechanism and then head to the next location to do the same. Once the bulkhead doors are sealed the mission will be complete.
You can then head to the Caliban’s Will by entering the hangar. There are some scant groups of Genestealers you’ll face off against on your way to the hangar; dispose of them quickly and reach the waypoint to end the mission.
Chapter 4 includes moving through the Sanctum Imperator to clear it out so that the Death Wing forces can move in and breach a pathway into the Caliban’s Will. The Space Hulk is composed of many ships jammed together, so in order to get to the Caliban’s Will you’ll need to bee-line through the Sanctum Imperator’s engine room and maintenance corridors.
The pathway to the Caliban’s Will takes you through the main cathedral halls of the Sanctum Imperator. The halls are large and open, so you’ll have room to breathe with long range weapons with good AOE.
After you clear out the main hall, you’ll unlock the Thunder Hammer and complete the main mission leading toward the Caliban’s Will.

There are power relays that must be deactivated at distinct locations, mostly through tight maintenance accessways and tiny corridors. This segment is perfect for melee weapons such as the Thunder Hammer, especially since you can use the shield against the projectile enemies and the hammer against the larger enemies during close-range encounters.
Finish up deactivating the power relays and then head to the Caliban Will’s boarding site through the Sanctum Imperator. There are a few Genestealers but it’s mostly clear sailing from there.
A vision will play where you’ll be able to use a fire face with a shield. Follow the corridors lined with the xenos and take them out with your lightning, fire and mace combinations. You can also use the shield to volley nearby enemies out of the way.
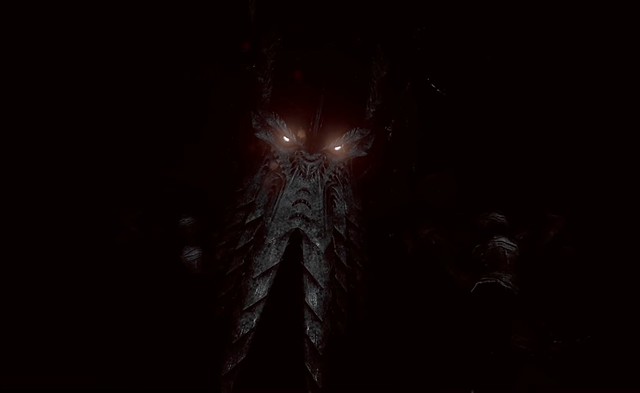
Head into the light where a Cthulhu monster will become visible, and then you’ll have to fight off a horde of xenos for a little while until the mission ends.
There’s a bar at the top of the screen with a “Calculation Running” text to give you an idea of how long you’ll have to stave off the hordes.
While the hammer was good during the tight corridors, the Bolter shotgun or chaingun would be better suited for the final objective of the chapter.
You can gain access to the new Hellfire rounds for the Bolter, as well as some new points in which to upgrade your abilities.
In Chapter 5 you’ll finally get to enter into the ancient Librarian ship, the Caliban’s Will.
You’ll need to venture through the old vessel and place an augur-primus in the main console of the ship.
For the locked doors simply burst through them with unmitigated might; nothing stands in the way of the Death Wing.
Make your way through the halls and fight the Cthulhu-xenos. A flamethrower isn’t a bad option, but keep in mind that there are turrets mounted on the wall at some parts.
Once you reach the console it’s revealed that the chamber you’re looking for isn’t on the main map display and that it’s hidden, so you must search for the hidden room. Head to the Scriptorium 5-N room to access the room that leads to the artifact.
You’ll need to secure the room, which means another wave of blasting through endless hordes that aren’t so endless. In fact, to secure the Caliban’s Will, you’ll need to kill just over 200 enemy lifeforms, and then the area will be secure for more squads to enter the ship.
After finding the artifact and battling a boss it’s time to head into Chapter 6.
The next mission takes place in the Rogue’s Caravel where a Genestealer brood have moved into an area where they have attempted to use the Dark Angel DNA to create hybrid xeno armies. It’s up to the player and their squad to take out the Genestealer brood and prevent them from perverting the Great Emperor’s genetic heritage.
Head to the Savior Array and take out all the Genestealers along the way.
When you get to the array you’ll need to defend the bridge area for a few minutes while the array Is being accessed. There are a lot of xenos that come through the narrow bridge area, so it’s probably best to use a flamethrower to wipe them out quickly, or equip the shotgun to get the job done.
You’ll unlock the Mace of Absolution after completing the mission. From there you’ll need to trek 300 meters to place a beacon at the designated waypoint to allow the Dark Angels to travel to that location.
The Mace of Absolution will give you some solid short-range AOE dispersion, making it ideal for traveling through cramped areas and tight corridors.
Reaching the destination will complete the mission, and the next mission will involve attempting to escape the area so the ship can be destroyed. The mission will start with a bang, as you’ll be flooded from all sides by lots of xeno hordes, including some huge mini-bosses.
Don’t be afraid to run out of the way and regroup at a more advantageous position.
Head into the extraction bay and the final mission in the chapter will be complete. Chapter 7 will take you to the Red Ark.
You’ll need to close down the doors to constrict the forces as the Chapter prepares to unleash a deadly virus to wipe out the Genestealers. A short cinematic will warn you of a nearby Broodlord who emerges from a hole in the floor. Kill him and the hordes.
There will be three Psychers picked up by the Librarian, follow the waypoints to destroy them.
The Witches can be challenging due to their ability to go invisible, but there’s a life bar at the top to give you an idea of how much you’ll have to whip them down in size before they’re good and dead.
There’s a complete gameplay walkthrough available that clocks in at four and a half hours in case you just wanted to watch it all in one go. You can check it out below.
Space Hulk: Deathwing is available right now for the PC and is set to launch soon for Xbox One and PS4.