Gearbox Software and Blackbird Interactive’s Homeworld: Deserts of Kharak has been making waves in the sales department for its high-quality graphics and intense RTS gameplay. For gamers looking for a complete look at the game’s campaign mission, including the various playable units and the game’s endings, you can check out a complete gameplay walkthrough.
YouTuber Serious Gaming has put together a 12 video playlist featuring Homeworld: Deserts of Kharak from start to finish. You can check out the playlist below, where the game is being played on the hardest difficulty setting, “Classic”.
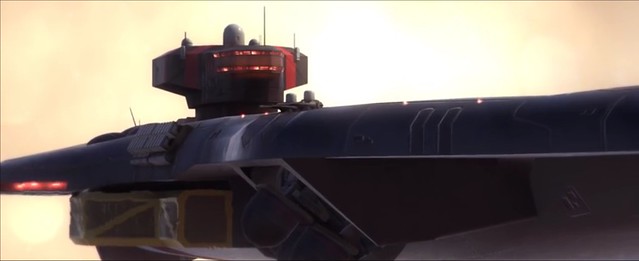
In the campaign everything is controlled through the mobile jet command carrier. The carrier, the Kapisi – which sounds very similar to the Khaleesi – can be used to deploy units.
The Boneyard sees players having to re-instate decommissioned units while fending off the base and units from incoming Gaalsien attacks.
The first mission in the Boneyard is really easy and just requires picking off enemy units and protecting the Kapisi while gathering supplies. As showcased in the video it’s best to keep the units to together and take out the enemy forces that come into the area. It’s best to take out the small drone forces
The second mission, Cape Wrath, also known as Hell’s Gate, will see players having to use wits and irreconcilable resolve to deal with the forces. You can use the Kapisi and the supply unit to recover resources after clearing out the enemies. The extra resources can be used to engineer and deploy new units. During the segment where Rachel investigates the derelict carrier that once belonged to her brother, you’ll need to defend her unit.

During the attack it’s best to utilize the special abilities of the units frequently, such as using the light armored vehicles to deploy smoke to disrupt the targeting of enemy craft that get too close to your units.You’ll also need to keep a group ready to quickly head back to the Kapisi to protect it from enemy railguns, which can very easily and quickly destroy the Kapisi. In between attacks be sure to keep the Kapisi repaired.
After gaining a moment of respite following the attacks, be sure to fully repair Rachel’s scout vehicle and the Kapisi to full to avoid potentially losing any units.
As showcased in the video series above, it’s best to send a group of units up ahead to acquire the resource nodes to build railguns. Be sure to keep another group of units behind with the Kapisi to avoid getting ambushed by lone enemy troops.
Once you get the railgun resource nodes you can begin engineering them to add to your arsenal. Near the end of the mission you’ll need to take out the Gaalsien production cruiser. It’s best to flank the railguns from behind with the light mobile units while the Kapisi and other units attack from the front.

At the Sarathi Basin you’ll need to venture just to the left of the map to a small patch using Rachel’s scout vehicle. You’ll find the ship wreckage. You’ll need to venture across the map to various points of interest to recover resources. Serious Gaming uses the Sarathi Basin map to basically buff up all of his units and expand his unit count to replace the units that died in previous missions. After you interact with one of the wrecks, enemy Gaalsien scouts will attempt to take advantage of the situation. You’ll gain access to aerial strike vehicles during the mission, so be sure to engineer and produce the strike fighters as soon as they become available.
After scouting the other two wreck sites, more enemy units will attempt to attack the sites. You’ll need to macro-manage your units at each wreck site. Be sure to keep the appropriate units together to quickly take down enemy units, such as grouping railguns with tanks and keeping the light armor moving fast and free to get around the map as quickly as possible.

Kalash Wreck mission is another salvage mission. The purpose is to secure a perimeter and detonate the Kalash wreck to recover its materials. There are various salvage sites across the map that will require strategic combat planning and tight unit formations.
After you salvage all of the wreck sites a Gaalsien fleet will show up to wreck your cornhole. Pull back all your units to the Kapisi and use the bottleneck leading up to the Kapisi to dwindle their forces until they’re wrecked.
The Ashoka map can be very tricky due to all of the enemies located in the area. You’ll need to tread very carefully, keep your units together and utilize the aerial strikecraft carefully dwindle the enemies and chip away at their units. The Ashoka will come into the map from the Northeast near the resource deposit at the top of the map.
You’ll need to first defend the Kapisi and make sure it doesn’t get owned by any flanking attacks from the Gaalsien. From there, slowly pick off the Ashoka’s forces until you dwindle down its forces so you can destroy it with your remaining forces. Take the fight very slow and very methodically, taking out enemies until you can get to the Ashoka. Watch out for the EMP that the Ashoka shoots out that completely disables your units. Stay on target and pepper it before the Ashoka can get to any resource deposits and escape.

The final mission in Homeworld: Deserts of Kharak sees Rachel getting into the Khar Toba wreck while the Gaalsien forces make one final attempt to thwart the player’s efforts.
You’ll gain access to new weaponry that can be utilized against the Gaalsien, but it won’t be easy. It’s best to keep your units together and take out the enemy forces using light mobile vehicles to pick off the enemy stragglers as you lure them to your main forces. Aerial strikes and long range attacks against the Ashinta.
The final battle will be against a massive fleet of enemy units led by the Gaalsien flagship. You’ll need to utilize the bottleneck of the wreckage as a way to whittle down the enemy forces. However, the Gaalsien flagship has long range heavy projectile capabilities, so utilize caution.
You will need to get close enough to lure the defensive units protecting the flagship to get into one area so you can use the super weapon to wipe out most of the enemy units guarding the flagship in one big blast.
The one thing you need to keep in mind is that the enemy will directly target the Kapisi, so you’ll need to keep it back to avoid being blown to bits whenever a new wave of enemies appear on screen. You’ll need to basically pepper the flagship with long range attacks by kiting it around the map. Rinse and repeat until you wipe out the forces and blow up the ship.
You can grab the game from off of Steam for $49.99 or visit the official website to learn more.