From Software and Bandai Namco Entertainment’s Dark Souls III is finally available in the West for the Xbox One, PS4 and PC. Gamers are already blasting through the corrupted lands and battling the undead minions of evil. For gamers looking for a few hints and tips on fighting the bosses in Dark Souls III, there is a guide for that.
YouTuber Shirrako has an hour and a half long video featuring fights with all of the main bosses and all of the secret bosses in Dark Souls III. If you find yourself getting stuck fighting any of the bosses in the game, the video walkthrough not only shows you what their tactics are, but some of the best weapons and tactics to use against them. Check it out below.
The first boss you encounter is Iudex Gundyr. He starts off pretty basic with just a simple series of stab and swing attacks. In between his strikes you can get in a few hits and wear him down. However, as he’s weakened and his life is lowered, he reveals his true form, which is a large ghastly form. Keep your distance and after he does a scratching claw attack go in for a few quick hits and then get out. Timing is key and patience is the pathway to victory.
The second boss is Vord of the Boreal Valley. This boss fights like a pit bull, wild and untamed. Vord uses a mace in wide sweeping motions throughout the early parts of the fight. Simply roll under his swing and proceed to attack his body. When his life gets halfway down he will proceed to scurry across the room very quickly; stay out of the way as best you can. When he charges up his attack, be sure to run behind him to avoid being hit. Continue to hack and slash away hisbody in between his mace attacks.
The third boss is the Curse Rotted Greatwood. This boss is slow and lumbering, with mostly large AOE ground smashes. You’ll need to clear out his minions and then proceed to cut off his nutsack between his legs. After cutting off the first part of his rooted nuts, the only other part that can damage him is attacking the egg-looking areas of his body. These areas are located under his upper thigh, on the top of his hand, his nutsack, his back and part of his side. The Curse Rotted Greatwood doesn’t have very hard to avoid attacks,so it’s mostly just based on timing.
The Crystal Sage boss is one of the easier bosses given that the only real challenge is chasing it around the arena. Otherwise any standard attacks will do the trick. The Sage is nowhere near as difficult or as confounding as some of the other bosses when it comes to tactics and difficulty.
The Abyss Watchers is a completely different story from the Crystal Sage. They’re very fast and very difficult to engage. You will have to wait until three of them have spawned and two begin to fight one another, then move in and attack the main Watcher. You won’t have a lot of time to get in your attacks. They’re too fast with their combos to engage outright, so you’ll need to spend most of your time running away from them. Luckily, the Abyss Watchers don’t have a lot of life. After killing the first set, there’s another Watcher, the Lord of Cinder, who you must fight; he uses fire attacks. Wait for him to finish his combos and then get in a quick strike in between openings. Rinse and repeat to chip away at his life.

High Lord Wolnir, the giant skull boss, must be attacked at his wrist and hands. Wait for him to do a smash toward the ground then attack his hands. He’s especially slow, so it’s not that difficult to get in the hits. It’s best to focus on the gold bracelets around his wrist, as they diminish more of his life when they’re destroyed. The only attack to really watch out for is the knife strike into the ground that creates an AOE wave. Just remember to dodge out of the when you can, after he raises the dagger.
The Deacons of the Deep are the next set of bosses. They aren’t terribly hard so long as you keep your distance and pick and roll. Kill a few and then back up. Rinse and repeat the method of taking out some of them and then backing up to maintain your distance, otherwise they will swarm you and easily overwhelm you.
Pontiff Sulyvahn has many arching strikes and sweep attacks. You’ll have to time your attacks in between his attacks for the first half of the fight. Get in close and roll when he performs overhead or swinging attacks that leave him open. Proceed to get in a hit or two and then wait for him to attack again. Keep up this tactic until he transforms. In his second transformation he gets faster and the attacks become quicker. You can get in a quick hit when Sulyvahn does an upward strike. However, after getting in the hit you’ll want to quickly get out of his attack radius because his clone will follow up with an attack. The second half of the fight is tricky because it relies on quick reactions from the player to get in hits between the boss strikes. You can also get in a series of hits after Sulyvahn does a diving strike from the sky, just roll out of the way and his back will be completely exposed; go in for the kill!
Yhorm The Giant is one of the bosses players have seen rather frequently due to being featured in a lot of promotional art for Dark Souls III. You can only attack his legs, taking very little damage in doing so. It’s a chip-away fight that’s not very difficult but is very much a battle of attrition. It’s about maintaining your combos, maintaining your stamina and staying alive through the arduous fight. Just continue to roll out of the way of his attacks and keep chipping away at his legs. When his life gets halfway down he will unleash fire attacks, including an AOE attack. There isn’t really a telegraph for his AOE attack, so there’s no way to avoid it unless you just randomly roll. When Yhorm’s life is a quarter way to the bottom, he will begin doing some sweeping attacks. Just stay to his back when he does this. Some players suggested using the Storm Ruler for taking down Yhorm quickly.
Up next is Aldritch, Devourer of Gods This boss has a lot of classic old-school boss battle patterns. Attack its tail in between its projectile strikes to weaken it. It will shoot down a hail of arrows at you at times, so when you see it calling down the arrows simply hide behind one of the pillars to avoid being hit. Continue to attack the tail until its life is pretty low. From there just finish it off with a few strikes to the torso.
The Dancer of the Boreal Valley is one of the bosses oftentimes featured in the promotional gameplay footage of Dark Souls III. The Dancer is long, lanky and very nimble. It has a couple of main attacks, including a lower sweeping attack with the sword, a swipe with its fist and a series of arching sweep attacks. At the start of the fight it will only use the lower sweep and first strike, simply roll out of the away and strike at its body. After its life gets halfway down, the Dancer will proceed to use more arching strikes and complex combos. It’s best to wait for it to finish its attacks, get in and make a hit or two and then back away. The lower its life gets the more seamless its combos become, so it will get harder to pick and roll. It’sbest to wait for the Dancer to do a heavy attack and strike between the slight pause in its combos.
The next boss is the Old Demon King, a fiery boss with a club. Try to stay at his back and chip away at his life. His AOE attacks will do devastating damage so don’t be afraid to block or dodge out of the way. He may be lumbering at times but the Old Demon King takes a lot of life, so fight him smart and tactically to avoid losing a lot of life. There’s no shame in fighting him slowly.
Oceiros, The Consumed King is a different kind of boss that fights defensively in protection of its child during the first half of the fight. This requires players to pursue Oceiros, and strike between attacks until its life is brought down to the halfway point. After that Oceiros goes on the offensive and uses its dragon breath, tail and claws to do a lot of sweeping and swiping attacks. Attempt to stay underneath it and keep striking it to avoid taking damage while you do damage. Maintain this tactic until it’s killed.
The Dragonslayer Armour is like a standard enemy just slightly bigger and more aggressive. Roll and dodge out of the way like you would a common enemy and proceed to strike in between his attacks. His shield will keep him from taking too much direct damage, so wait for him to perform a heavy hitting attack before striking at his rear. When he does the two-handed axe strike toward the ground, it’s a perfect time to get in a heavy hitting combo right at his front.
The next set of bosses, Lord of Cinder Lothric, Younger Prince & Lordan, Elder Prince, can be very difficult because the beginning of the fight starts with the boss teleporting around and using lateral swiping motions to keep players at a distance. This requires rolling and attacking maybe just once or twice in between the attacks of the boss. After defeating the prince the first time, he rises with his brother attached to his back. The second fight is a lot more difficult. The brothers Lothric are fast and teleport around very quickly. However, one of their attacks leaves them completely open: when they finish teleporting they will do a have strike into the ground, leaving them wide open for a devastating combo. They also teleport and perform a fiery sword attack that also leaves them open for attack. When you kill the first brother, the one on the back will have to restore him – while the brother is performing the restoration, attack him, as he is still vulnerable even after his brother falls.
There’s another boss walkthrough guide from YouTuber Duck360Gaming2 that covers some alternate tactics worth checking out.
You’ll find Champion Gundyr in one of the areas leading toward the secret armor. Gundyr isn’t terribly difficult at first. Simply dodge his halberd attacks and strike at his body. However, after his life reaches halfway, it moves quicker and strikes more hastily, making it difficult to get in attacks. You’ll need to attempt to roll toward him while dodging his attacks in order to get in an attack before hemoves out of the way.
Another secret boss is the Ancient Wyvern. You’ve likely seen this boss appear in many of the videos for Dark Souls III, but never actually do you get to see the actual fight with the boss. Well after getting through the bridge area, proceed to travel up to the top of the area and drop down on its head with a killing blow to its brain. This will kill the Wyvern instantly.
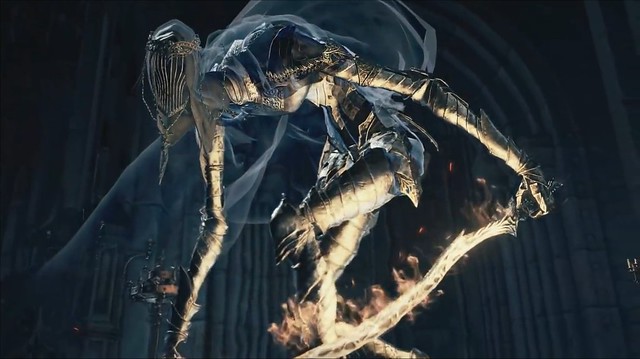
The Nameless King is fast and large, but offers many attack vectors,including the neck of the giant creature and the legs. The best option is to get in as close as possible and stay underneath it while attacking the legs. When its neck is exposed, go for the neck. The giant bird isn’t too hard to defeat.
After the bird is defeated players will have to battle the Nameless King in a one-on-one fight. When he isn’t doing combos, the King has a few heavy strikes that leave him open. Dodge or roll out of the way of all his attacks and keep your distance when he does his combos. When he does a heavy strike where he pauses briefly, use that opportunity to get in a hit or two. This is another battle of attrition, where patience and timing is key to victory.
The final boss is Soul of Cinder. This is the boss on the cover art of the game. The battle takes place on a rather poetically melancholy battlefield. Cinder has very basic attacks. Simply roll and attack, roll and attack. After his life gets halfway down he begins using more devastating attacks. Keep your distance and and attack him after he fires his projectiles and between his standard attacks. He’ll have one more final form where he wields a fire sword. Wait for him to finish his three-hit swinging combo and then unleash your own combo on him. He has an AOE attack and a lightning bolt – for the lightning bolt simply run out of the way, and for the AOE get your distance. When his life gets near the bottom in his final form he has some devastating combos you’ll need to watch out for, and once he starts and you get trapped in them,you can’t do anything until he finishes. So pick your openings carefully.