Playdead’s Inside has been making its way around the gaming market on both Xbox One and PC. The game is currently available via digital distribution, and it has some interesting physics-based puzzles that might get a few people stuck. No worries, though, there’s a complete gameplay walkthrough guide available for Playdead’s Inside.
YouTuber MKIceAndFire has a full playthrough of the game from start to finish that you can check out below, covering each and every segment, including the credits and ending. Check it out below.
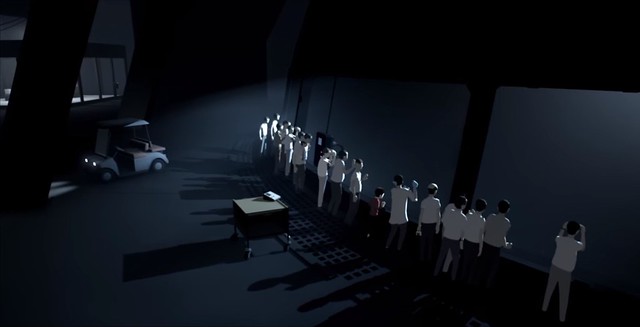
When the truck is there with the group of people, simply wait for them to close it up and drive away. Hide behind the rock while they do so.
When you get to the next two individuals, you’ll need to wait while they search the area with their flashlights. Be patient and you’ll be able to wait for them to leave before proceeding onward.
For the wall – simply push the old refrigerator over and use it as a platform to climb up and over the barricade.
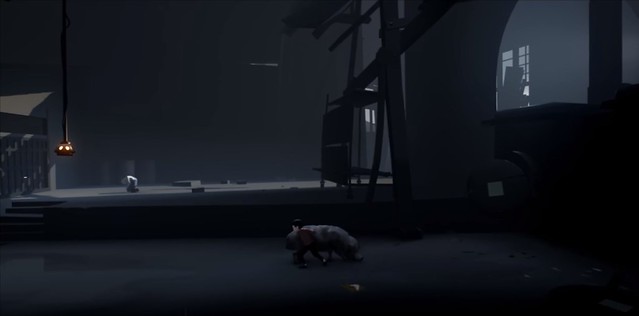
You’ll get to another segment where there’s a steep ditch the boy can’t climb out of on his own. There’s a broken box that you can push into the ditch and use it to climb up.
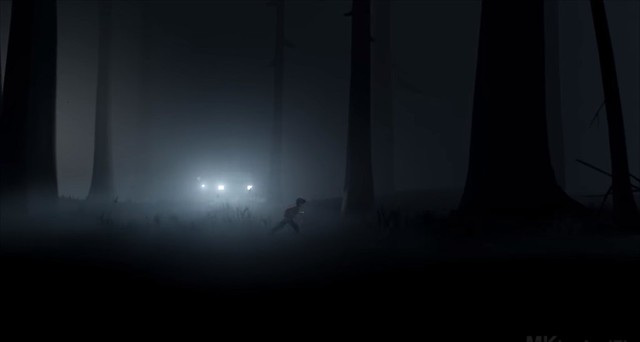
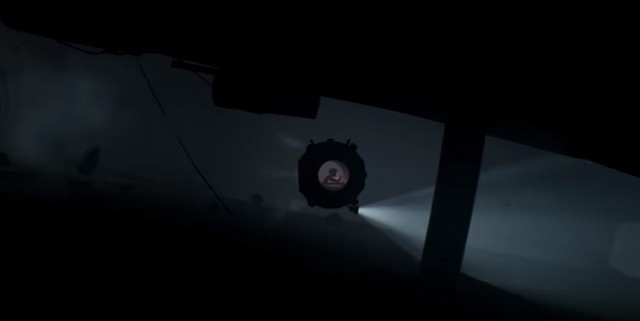
When you get to the part where the van begins to search for the boy, run away from it until you get to a small ledge. Hop off the ledge and then move underneath it to avoid being spotted.
When the two men begin to chase you, be sure to keep running and don’t stop until you get to a small trailer. Wait for the jeep to pull in where they’re no longer looking at you before taking off and running again.
You’ll eventually fall off a small cliff into the water. Be sure to dive under the water and swim past the spotlights to avoid being shot.
When you get into the barn, start up the machine with the pulley system and then go and unlock the door that leads outside. Let the small birds into the warehouse and then run around until they’re positioned where they can be suctioned up by the machine and spit out toward the hay bale sitting atop the ledge. With the small birds catapulted at the bale, they will knock it over and you can use it to get over the platform.
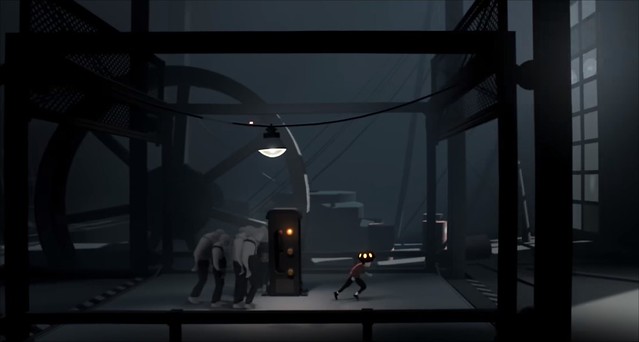
For the section with the pig… use the rabid pig to bust through the wooden wall to get into the abandoned facility. Lead the pig to hit the wall and knock it out. Grab its tail and pull off the slug thing on it. The pig will mostly be incapacitated. Proceed to push the big underneath the glowing helmet hanging from the ceiling. Climb up the pig and latch into the helmet. Use the helmet to move the zombies around and lift the gate up to free the other zombies. Use all of the zombies to push over the rickety platform to create a ramp and get to the next segment.
When you get into the next building with the cart and the chain…. to get up the chain, simply push the cart attached to the pulley system toward the wall and it will lower the chain enough to climb up.
After going through the next area and pushing the giant safe through the floor, you’ll move through an underground area where there’s another zombie helmet. Use the lever to lift the door and then use the helmet to get both zombies out. Close the lift and then proceed to position both zombies on the platform switches located in the floor to open the door.
When you get to the part with the two giant security drones and the disabled elevator, you’ll need to turn the security drones on and then hide behind the pillars to avoid being spotted. Proceed to head to the elevator before the drones turn off. Use the elevator to get to the next segment.
You’ll need to do a “Simon Says” segment with the zombies – just remember to jump within the first yellow box and turn left and then turn right in the second yellow box. Remember not to press anything when standing outside the boxes, other than follow the leader.
For the puzzle just after that, you’ll need to use a zombie to drag the boy across a platform while he’s attached to the cerebral mind control device. You’ll eventually get to a door that’s blocked. You’ll need to push the boy all the way to the far edge of the screen and then use the zombie to jump up into a second mind control device, where another zombie will need to pull the crate toward the platform, hop up onto the platform and then stand on the switch.
Make sure that you’ve moved the crate over the platform so when you switch back to the first zombie the boy doesn’t fall to his death. Proceed to use the boy to jump back into the mind control device and use the first zombie to then pull the crate – with the boy attached to it – through the door to get to the next segment.
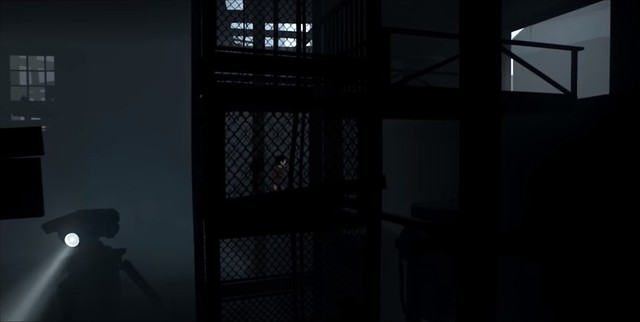
After you get into the water and swim down and unhinge the crate to use it get past the water segment, you’ll eventually end up at a part where security forces will be monitoring some rooftops. You’ll need to lower a cage with zombies in it while hiding from the drone spotlights. Simply use the shadows of the pipes to hide from the drones.
Eventually you’ll get to a segment involving some annoying dogs that just won’t leave you alone. The objective is to keep climbing back and forth over the fence, and while the dogs are on the left side of the fence, attempt to pull off one plank blocking the area. It requires a bit of precision timing and some patience, but it’s not too difficult to get through.
When you get to the segment with the submarine, you’ll simply have to wait for the diver to get out and go inside the office. Proceed to travel in the sub until you get to the locked access door. You’ll need to travel up, open a door, let some giant cylinders fall into the water, head to the next segment, use a pressured platform to get to the next area, flip the switch to open the door and then get back into the sub. Be sure to use the sub’s charge up attack to break through the doors that have wooden barricades through them.
When you get to the area with the underwater zombie wraith, just keep the spotlight from the sub trained on the zombie wraith to prevent it from attacking you.
When you get to the underground area with the group of zombies, you’ll need to head to your far right and go through some platforming areas until you can reach the mind control device. Once you get it, it will break off but it will stay on the head of the little boy. Use it to control the zombies to lift the boy up to places he usually wouldn’t be able to reach.
Use the zombies to pull one of the mining crates underneath the hole in the floor. Then climb up the rope and fall through the floor on top of the mining cart. Have the zombies push the cart over to the ledge and then proceed toward the far left of the area where more zombies are up inside of a cage suspended above the ground.
Remove the crate from the pressure device and then activate the pressure cage. Push the box underneath the platform before it hits the ground so the platform rests underneath the pressure cage. Cook the pressure cage again to reach the cage lever and free the zombies.
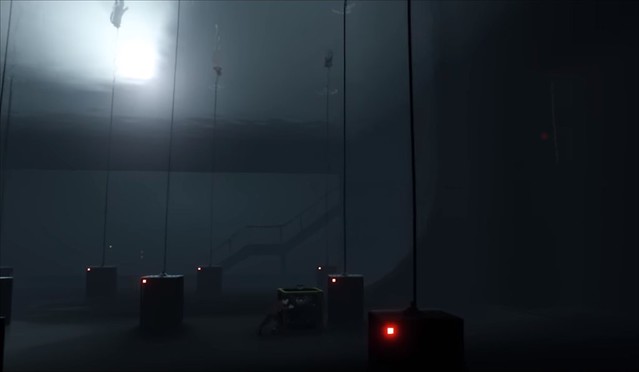
Take your army of zombies up to the platform and then use them to push the cage off the ledge to free even more zombies. Take those freed zombies and then use them to free the zombie locked in the cage. Use all of those zombies to then throw the little boy over to the platform to free the zombies in the mine cart. Use all of those zombies to then head over to the pressure platform with the “19” counter on it to open the door and escape.
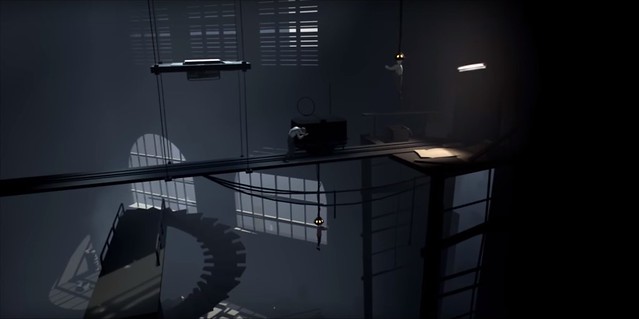
The following segment is basically a timing puzzle – hiding behind the objects to withstand the blasts that would otherwise kill the little boy. The one tricky part is timing hiding behind a gear arm that rotates around, simply wait for the sonic blast to occur and then hop down to the platform to hide behind the gear arm at just the right moment.
The next segment involves attempting to outwit and out-swim a water wraith.
The boy seemingly “dies” at one point when he falls from a platform and the water wraith drags him to the bottom of the watery grave… but a plug manages to save the boy and players must then swim through what used to be an office building until an access vent is discovered that opens periodically. Head inside the vent and hold onto the fulcrums to avoid being turned into mincemeat by the fans.
When you get to the gravity room with the water suspended in the air, you’ll need to head down below use a retractable platform to knock one of the pressure cages off its pole, push the pressure cage onto a slant and have it fly up to the next platform where a ladder is, then push it under the hole in which you first fell and activate it so it flies up into the gravity well room.
When you get up there you’ll then need to push the second pressure cage on top of the first, but not before first activated the first pressure cage. After pushing the second cage ontop of the the first, proceed to activate it so that it jettisons you up into the suspended water. You’ll need to activate both sides of the water suspension tank to open it up and then swim up inside.
After sneaking through the facility and freeing the deformed zombies, you’ll need to use them to walk to the platform closest to the water and have them throw the boy up into the suspended water, so he can flip the switch to open the locked door on the right side of the room. Simply swim down in the direction of the switch to activate it.
After finally making it through the office area where a bunch of office workers and scientists are, you’ll need to push mail cart over to the ladder and climb up – head over to the observation crane and use it to to move over to the larder on the right. Climb down and head into the water.
After freeing the mass of bodies in the observatory you’ll need to blast through the facility and attempt to escape. When you get to the lower part when you use the ledge to open the door and the dogs begin to chase you, grab the broken ledge and use it on the pressure plated floor to raise the lift and climb up to get to the other side.

When you get to the part where the mass of bodies gets a hold of a wooden crate, you’ll need to head to the far left across a small pool and put the crate on fire inside of a furnace. Carry the crate over to the water and toss it up over the sprinkler systems until you get the part where you can throw it up into a vented system… it will then open a door and allow you to escape.
After some fumbling around, you’ll eventually make it to a part where a pressure cage is located above you but it can’t be acquired… the floor will open up and you’ll fall into the water and seemingly sink to the bottom. On the right side are some panels that you can pull apart and squeeze through that will eventually lead you to the end of the game where the mass of bodies will fall down a cliff toward the beach.