Cracked Head Games and Headup released Silver Chains onto the Steam store for $24.99. The modern day horror title hopes to become a cult classic, but before that can happen gamers need to get to the end to see if it’s worth the trip down the halls of a hell-worthy nightmare. Well, if you picked up a digital copy of the new thriller, but you’re having a tough time reaching the end, there’s a gameplay walkthrough available to help you out.
There’s a complete gameplay walkthrough guide provided by YouTuber Max Horror, which you can check out below, clocking in at just over an hour.
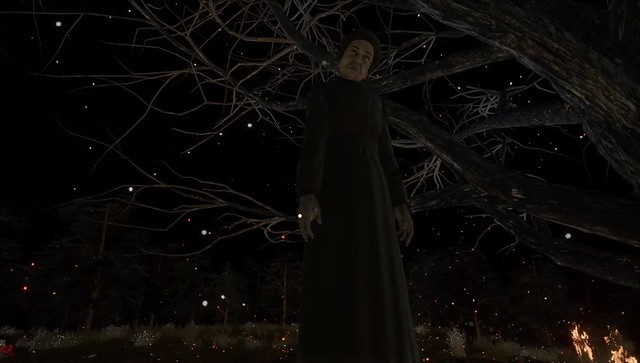
The game starts with the player character waking up from a crash after hitting a tree.
Make your way down the pathway toward the mansion through the busted-open gate.
As you walk, the character will black out from time to time. Just keep moving until a cutscene with a tree plays.
Peter will wake up and exit the bed. You’ll be able to move around the room.
Make your way to the light switch with the dangling babies – press ‘E’ to interact with the switches, doors, and objects. You’ll need scissors before you can open the door.
Exit the room and head into the next room, it will inform you that the key is in the library. You’ll also need a key to open the jewelry box on the stand.
Go over to the door and take the scissors out of the door stuck through the note.
Press ‘I’ to open your inventory.
Take the scissors back to the room with the baby dolls and use the scissors on the lanterns to equip it.
Take the lantern into the next room where it’s really dark and use it to navigate through the hall; press ‘E’ to duck down and exit the room.

Head right down the hall and follow the ball to the end of the hall.
You’ll see a little boy come out and grab the ball before disappearing into a puff of black smoke.
Go into the room and examine the bloody hand print on the floor; take the fire poker from the stand.
Go hover to the tea table and read the letter.
Head into the next room and grab the note from the floor that’s slid under the door. It reads “Let’s play”.
Head back into the sitting room where the Victrola will start playing. Attempt to go into the bathroom but the door will close. Turn off the Victrola and then go into the bathroom and interact with the bathtub. A hand will pull Peter into the bathtub.
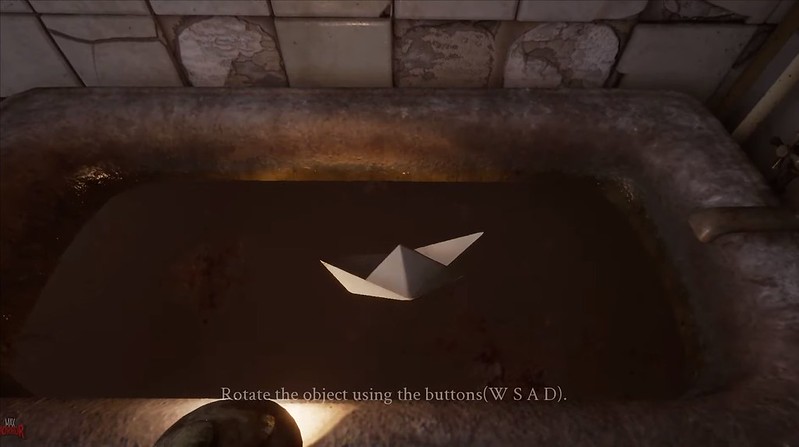
Take the little paper boat in the tub and flip it around to read the note, which states children aren’t allowed to play in the kitchen.
Go back into the room where you got the note about “Let’s Play” and there will be another note that says “Come In”. Examine the letter and there’s a wrought iron key inside. Take it.
Go into the room, push the chest over underneath the hole in the wall.
Use the fire poker to navigate over and grab the key off the wall. Use the key to unlock the padlock on the door to exit the room and head downstairs.
Open the door to the kitchen and then proceed over to the stove top oven and read the note.
Interact with the door and then interact with the door to the dining room a second time to enter.
Go over to the double doors and enter into the next room with the little girl in the corner. Interact with the girl and then proceed into the guest room with the piano. There’s a letter on the grand piano. Read it.
Sit down and play “Fur Elise” on the piano.
A door will open in the distance.
Exit through the double doors on the other side of the room and go down the hallway until you reach the sitting room.

Head upstairs and the Mother will chase you. Very, very quickly race toward the armoire that the little girl is pointing to and press ‘E’ to hide inside. Wait for the scary lady to leave and then exit and go into the room next to the wardrobe, which has a broken sconce by the lamp. Take the lever.
Exit the room and go back to the amoire – on the side you can push it to reveal a secret passageway. Go inside and run to the end of the passageway using ‘Shift’. There’s another armoire just outside the passage to your left. Quickly hide inside until Mother goes away.
Exit the cabinet and go over to the teacher’s desk and read the note.
There’s also a book on the desk that you can read as well.
You’ll be tasked with finding other pieces of a photo before you can leave.
The first piece is on the northwest side of the room on the side of the shelf. The next piece is on the photograph on the teacher’s desk.
The third-piece is in the southeast corner of the room on the side of another shelf.
Once you have all the pieces, place them on the blackboard and the door will open.
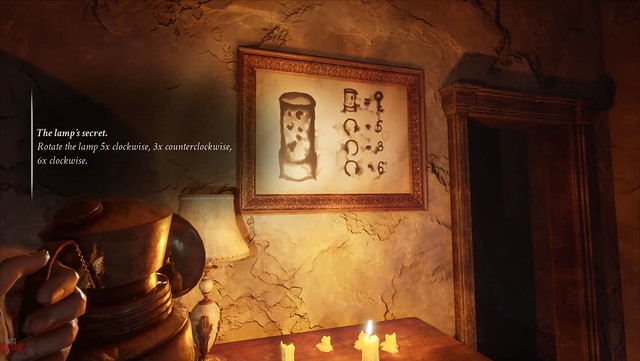
Exit the room and head down the hall and go into the room at the end of the hall where there’s a letter on the desk and a solution for solving the lamp puzzle, which requires you to rotate the lamp 5x clockwise, 3x counterclockwise, and 6x clockwise.
Exit the room and there’s a man mummified in a chair who will disappear into a ghastly mist of black smoke.
Head back to the children’s room with the lamp and follow the instructions as depicted in the solution. There’s a key to the second floor inside.
The key will open the double doors that leads out onto the staircase landing.
Go into the room on your left and there’s a monocle on the wall.
Take the Monocle and equip it. Follow the markings on the floor to the corner wall and press the wall in using ‘E’ and it will open a secret wall.
Use the Ouija board and you will be tasked with finding the pieces of a doll.
Exit the room and go over to the map. It will show you where on the map you need to go to get the first piece.
Go to the third floor hallway with the doll piece symbol that leads into a storage room and you’ll find a missing piece for a painting. Take it and then hide in the armoire.
Exit the third floor and head down the steps toward the first floor; take the broken statue head. Head further downstairs into the hall – follow the markings on the ground using the monocle and it will lead you to the double doors and into a private study.
Read the note on the desk.
Place the missing fleur-de-llis piece on the painting and rotate the symbols on the painting in the following order: North, Northwest, Northeast, South.
The painting will open and doll legs will be inside. Take the legs.
At the opposite end of the hall there’s a little boy under a light. Go to the boy and he will disappear. Exit the room and head upstairs to the third floor. Follow the markings on the floor to the room at the end of the hall on the right.
Open the latch on the door and go inside the labyrinth of bookshelves.
Follow the kids who keep running around the corners and they will lead you around the maze. Follow the noises until you reach the doll’s jaw on the table.
Take the jaw and exit the maze.

Make your way down the hall back towards the room opposite of where the lantern was located.
The room is now open and you can go inside. Read the puzzle note on the desk and the letter on the other desk.
Push the desk over to the side; before you can get the doll piece a little boy will run off with the piece. Chase the boy through the passageway and up the steps to the third floor.
Timmy will race up to the attic.
Follow him to the ladder until he pulls the ladder up.
Head back to the second floor and interact with the Ouija board.
You’ll be tasked with finding five drawings in order to lift the curse.
Use the monocle to track down the drawings.
Proceed downstairs to the sitting room on the first floor and use the library key to access the library for the first time.
You’ll have to find the picture of the sun and then find the sun in the picture.
Go over to the desk with the glass diorama on it and take it. On the opposite side there’s a hand print on the wall. Go over and interact with the wall panel; there’s a small key inside the doll’s head located inside the wall. Take it.
Head back upstairs to the second floor and head around to the room that you first came out of at the beginning of the game by crawling through the small hole in the wall.
Go over to the vanity mirror and use the key from the doll’s head on the music box.
Press the corresponding buttons that appear on the screen as the dancer inside the music box rises up.
It’s a little bit like a quick-time event except it’s a slow-time event.
Take the item inside and then quickly go hide in the cabinet.
The scene will cut to Peter out in the plains by a tree.
Go up to the side of the tree and read the note.
Peter’s mom will be lynched from the tree – read the note in her hand. The vision will end and Peter will wake up back inside the house.
Read the letters lying around the room.
Go over and interact with the chest full of doll parts.
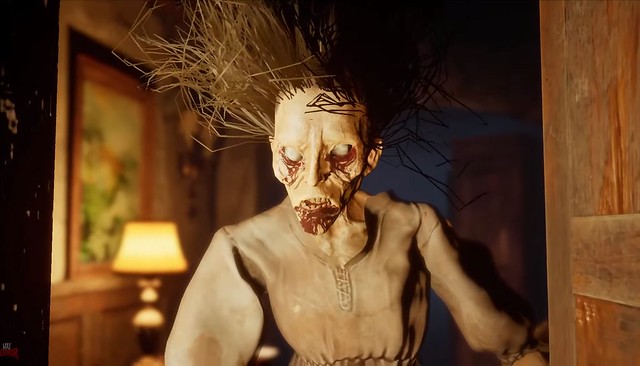
The scene will switch to Peter with a shovel, and you must run around and kill the dolls.
You must kill two dolls and then chase the third doll to the hole in the wall behind the chest.
When the vision ends, there’s a doll in the chair. Listen to it talk and then go to exit the room and Peter will be knocked out by the doll and taken into the attic where a ritual will be performed.
Activate the sacral circles and then go talk to Ellie.
You’ll need aconite to finish the ritual.
Head through the attic, underneath the rubbish and take the aconite from the book that falls off the shelf.
Use the monocle to spot other pieces of aconite spread throughout the mansion.
Exit the attic and a door will open, leading you into a room with a ball on the table. Take the ball from the stand and read the letter underneath the ball.
Exit the room and head down the hall from the third floor to the second floor. Go back into the room where you first started inside the mansion and push the dresser over to reveal the hidden hole in the wall that leads upstairs to the garnished room with the covered furniture.
Activate the statue heads on the pedestals.
There are three status you need to activate. Once activated a book case will open up and reveal a secret study with aconite on the desk. Take it.
Exit the room and head down the hall to the door with the roman numeral lock mechanism.
The code is: 6896
However, the code is actually inverted, and it’s really: 9686

Inside the room there’s another piece of aconite. Take it.
The last piece of aconite is located on the first floor.
Go around to the hole in the floor and there’s a ladder that will take you down to the last piece of aconite. Be warned, once you grab it the Mother will come busting into the room. There’s a cabinet that you can hide in near the door that exits the room. You’ll have to work exceedingly fast, though, otherwise she will catch you.
Alternatively, you’re fast enough you can outrun her by racing through the mansion and heading up to the attic.
Place the items and the aconite around the sacral circles and then go and take the laughing doll from the chair and hold it over the fire.
A cinematic will play and Peter will fade out.
When you wake up proceed to the end of the hall, go through the door on the right and then through the double doors on the left. There’s a family photo on the desk. Take it.
Exit the library and then go to the double doors on the right and you’ll be able to exit the house.
You’ll end up back inside the house, go into the room with the ghastly ghost lady and she’ll chase you.
Exit the room and run back to the armoire. Go inside and the ghost lady will chase you, grab the family photo from you, and then close the door.
Walk back down the hall and follow the ball to the evil doll, a knife will appear in Peter’s hand, who proceeds to stab the doll and then wake up from the vision.
Pull out the monocle and then look at the ceiling and it will crumble in; take the item from the rubble and then quickly run away.
Okay this next part is tricky because you’ll have to disable the two smoke valves so you can acquire the item you need to defeat the monster.
The valves are located in in the notches between the pathways. They’re on the back of the wall. They take a long while to turn off so make sure you have some ample distance between you and the monster before you begin turning the valves.
Once the smoke is disabled, grab the ball, go back into the circle, place the ball in the sacral circle and then lead the monster into the circle to finally defeat it.
Peter will stab himself, send the monster back to hell, and he will join Timothy and Ellie as the trio finally leave the cursed mansion.