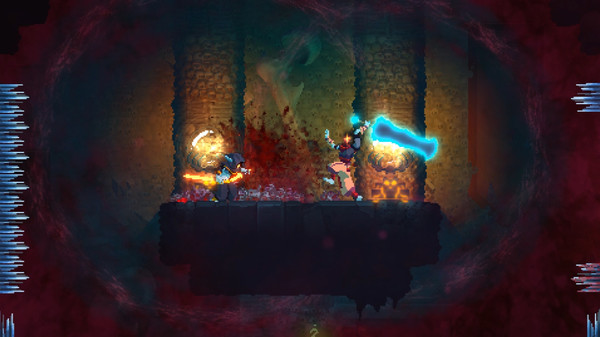
Call of Duty: Black Ops 3’s latest expansion pack from Treyarch and Activision has arrived. The PS4 gets it first followed by a release later in the month for the Xbox One and PC. The Descent DLC pack contains a number of new maps, including a brand new zombie map called Gorod Krovi. For gamers looking for the Easter Eggs, how to access the Pack-a-Punch machine, as well as how to ride dragons in the zombies map, this walkthrough guide will give you all the hints and tips you need to become a true zombie master on Gorod Krovi.
Easter Egg Guide:
YouTuber NoahJ456 has been putting in the work and pumping out tons of videos covering the latest Call of Duty: Black Ops 3 zombie content, posting up video walkthroughs for the Easter Eggs, hidden secrets and special weapons. You can check out the intro video below that gives you an idea of what to expect from the map.
So, according to Noah there are four different challenges to complete. The first three challenges are gamplay challenges, where-as the fourth challenge is to acquire a dragon egg.
For doing most of everything in the map, you’ll first need to access riding on the dragon. For that you’ll need to acquire three network circuits after you activate the computer in the main hall. This will initiate drop pods called Graph Modules to fall down at certain points in the map and they must be defended until they open up and grant you access to the network circuit. You have to battle the zombies ferociously with a heart of iron and steel resolve. The pods can be destroyed quite easily so don’t let the zombies attack it.
Once you complete the pod protection segment and you gain all three network circuits and take it into the base, you’ll need to activate the machine using the network circuits.
There are also some new Gobble Gum perks that includes instant Pack-a-Punch buffs for guns or opening up all of the special boxes on the map with bonus weapons in them.
Additionally, for the Valkyrie Drones, you can shoot off all of their limbs to prevent them from doing any massive damage. If you blow off their limbs they’ll do a weak suicide bomb toward you but it won’t do a whole lot of damage. Alternatively, you can attempt to shoot them square in the center of their camera eye to destroy them instantly, but they roll around in mid-air to evade your attacks, which can make it difficult to down them.
You’ll also want to keep an eye out for the Russian Manglers because they can be difficult enemies to battle if they catch you off guard and use their melee weapon on you.
There’s a useful Black Ops 3 walkthrough that goes through an hour and a half worth of Easter Egg hunting that you can check out below from Noah, covering many of the things that will also be further discussed in the guide.
The beginning of the video goes through process of selecting the necessary Gobble Gum items in order to unlock all the best items from the boxes and to survive very far into the latter rounds of the map.
There’s also plenty of gameplay featuring the PPSh-41 and how to utilize it efficiently in the map. Sadly there are no new perks on the map but the dragons will fly around and help you out occasionally by landing and breathing fire in the area, killing any nearby zombies. The video below covers how to go through the entire map and unlock the ending.
How To Get To The Pack-a-Punch Machine
Before you can Pack-A-Punch your weapons you’ll first need to go into the Dragon Command Center and turn on the power. Go into the building and flip switch to turn the power on. Zombies will begin to come out and you’ll need to defeat so many of the zombies to get the Dragon Command Code Cylinders.
You’ll need to get the Cylinders and head up to where you can deploy the modules – it’s just up the stairs, and once you activate it you’ll need to immediately head outside where a green beam of light should be visible going into the sky. You’ll need to follow the beam’s location because one of the drop pods will be there. Head to that location and proceed to defend the drop pods. It’s demonstrated in the video below.
As mentioned earlier, you’ll need the three network circuits.
After you get the first network circuit proceed to rinse and repeat the method for getting the Command Code Cylinder – that means killing more zombies and picking up the Cylinders. Take the Cylinders to the command computer that’s inside of a building with a giant hole in the ceiling. Activate the computer and a green light will go into the sky. Follow the light and rinse and repeat protecting the drop pod until it opens up and you can get the network circuit.
For the third and last card, you’ll need to head to the area where the giant robot is after collecting the the Cylinders, and activate the computer and it will call down the Graph Module drop pod. Rinse and repeat defending it until it opens up and you can get the network access card.
After you get all three pieces of the network circuits, head to the operations bunker and insert them into the machine.
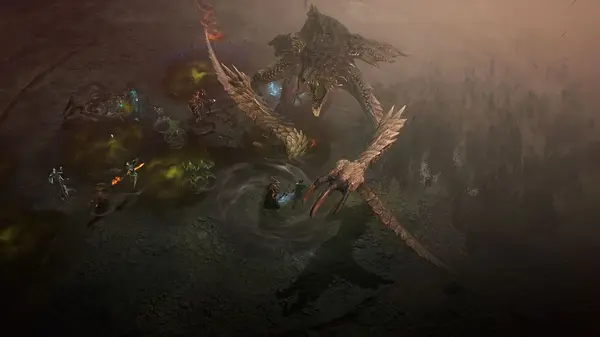
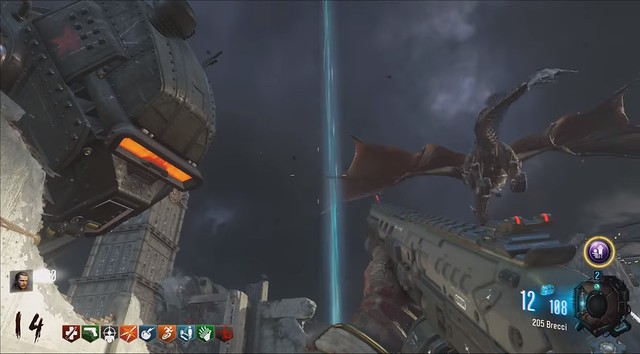
Run to the top of the base with the fallen over giant robot where Sophia’s computer control console is to summon a dragon, and you simply hold down the Square button (or ‘X’ if you’re playing with an Xbox controller) and you can then summon the dragon.
You can use the dragon to ride to a new area to access the Pack-a-Punch machine. The machine in this particular map does not need to be built; it’s already pre-built, you just have to get to it and access it.
You can also get a Dragon Strike from the Pack-a-Punch area, but it’s a difficult area to get out of. You have to fight your way out of the Pack-a-Punch area in order to get back to the other sections of the map.
The Dragon Strike is a call-down feature where you can have a dragon attack an area designated by a giant green target on the ground. In order to add the Dragon Strike to your arsenal, you’ll first need to complete the steps to unlock the Pack-a-Punch area, and while you’re there you’ll need to head to the top floor and activate the crystal in the container by holding down Square or the ‘X’ button. This will put the whole bunker on lockdown mode and you’ll have to battle against wave after wave of enemy zombies.
The zombies will flood in from the direction of where the windows will open, so be sure to look for them to open up to know where you need to go to take out the hordes. Youtuber jedixking98 showcases how to get through the zombie defense mode in the near three minute video below.
As he suggests, make sure you Pack-a-Punch your weapon loadout because the zombies that come out during the waves after the bunker goes into lockdown mode do not drop extra ammo or items. So it’s imperative that you stock up first before activating the crystal.
If you are successful in completing the waves, head back up to the top of the bunker and take out the Dragon Strike Crystal, and now you’ll be able to call it down and use it against foes or to heat up Dragon Eggs.
Ray Gun Mark 3 Pack-a-Punch Guide
So you’ve managed to get to the Pack-a-Punch but now you want to turn up the heat on the zombies with something special, right? Well, you can do just that with the Ray Gun Mark 3 pistols. Both guns fire different blasts but they take one shot each from the ammo count.
You’ll find the Ray Gun in the Pack-a-Punch area. The gun on the left shoots an orangish yellow blast that slows down the zombies. It also has a DOT effect, afflicting damage over time to the zombies.
The green laser fired from the gun on the right has a multi-target penetration effect; it fires directly through the zombies and does direct damage to each of the ones it hits. You can see it in action with Noah’s video below.
If you decide to Pack-a-Punch the Ray Guns, it’ll increase the ammo count and the damage output.
One of the really cool elements for the gun is if you shoot the left yellow blast and then shoot it with the right ray, it will create a blackhole vortex. The blackhole vortex does super high damage to zombies, and the damage will scale for each of the rounds, so the blackhole never gets weaker even when the waves get harder.
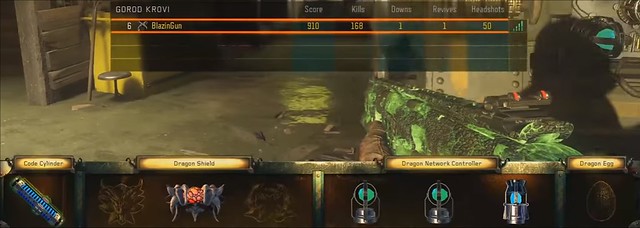
How To Build The Dragon Shield
One of the important items that you’ll need to complete some of the challenges in the Call of Duty: Black Ops 3 Gorod Krovi map from the Descent DLC pack, is a Guard of Fafnir Shield… better known as the Dragon Shield.
YouTube user jedixking98 shows off each of the locations for the three parts necessary to build the Dragon Shield, including the first part which is located on a shelf in the basement area where you input the network circuits
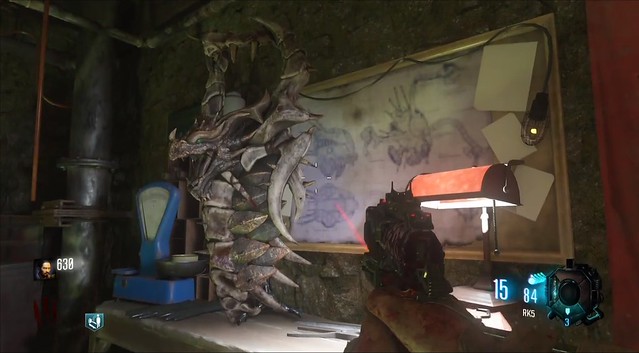
The second part is located just upstairs in the destroyed room by the floor. It’s a dragon head sitting amongst the rubble.
The third piece is located on the wall on the middle floor of the armory. If you need help locating the wall, it’s in the room adjacent to the room that has no roof. You’ll also find some stairs leading up to the top floor.
Head down to the construction desk or crafting bench where there’s a scale and a lamp and some diagrams on the wall, and build the Dragon Shield using the three parts that you’ve collected.
Now jedixking98 notes that sometimes the spawn locations for these parts will randomize. So keep that in mind when you restart the map or play it again and you find that the parts aren’t exactly where they were last time.
How To Get The Secret Russian Mangler Zombie Helmet
After you defeat a set of 20 Russian Mangler zombies, you’ll be able to unlock and equip a Mangler Zombie Helmet. It’s a secret helmet and you’ll have to go out of your way to find it. In fact, it’s located on a mannequin back near the starting area of the Gorod Krovi map. You’ll find the mannequin inside of a building tucked away at the far corner of the room on the second floor.
Once you find the mannequin with the helmet on, simply go up to it and grab the helmet. Once you equip it you’ll gain an additional 30% damage bonus against the Russian Mangler soldiers, as well as a 50% damage reduction bonus from the Russian Mangler zombie soldiers. You can see the helmet in action below with the video from NoahJ456. It’s a short and sweet minute and a half long video.
It’s a useful item to equipment because it will help out a lot when battling against the Russian Manglers or if they manage to get their claw on you. The 30% extra damage bonus will also reduce the amount of ammo that’s required to take them down.
Another video from YouTube user TheSubPredicate explained that the best way to kill 20 Russian Manglers is by activating the crystal on the top floor where the Pack-a-Punch machine is, and during the lockdown mode you’ll fight enough Manglers to unlock the helmet. He explains it in depth in the video below.
How To Get The Dragon Egg And Gauntlet Of Siegfried
In order to get the Dragon Egg and the Gauntlet of Siegfried you’ll first need access to the Pack-a-Punch machine and the bunker where it’s stored. If you’ve completed the Dragon Network segments and are already at the Pack-a-Punch area, you’ll need to complete the zombie waves where you have to defeat wave after wave of zombies at the Pack-a-Punch bunker. After doing so, head into the underground area before you get the Dragon Strike.
Move over to the chute that leads to the water access, but do not enter it. Instead, look up just above the shoot and use the Ray Gun to shoot beams just above the chute with an explosive weapon and a giant egg will roll down.
Do not damage the egg. Wait for it to finish rolling down and then pick it up pressing Square or the ‘X’ button if you’re on the Xbox One.
Proceed to take the chute and head back to the main part of the map. Proceed to the Dragon Command central station and head to the front of the building where the destroyed tank is. There’s a nest right in front of the dilapidated tank. Place the egg into the nest.
Proceed to use the the Dragon Strike on the egg to heat it up. From there you’ll need to cool the egg down, so wait an entire round before you can pick the egg up after it cools down.
Head back to the challenge board after you complete the Dragon Egg challenge and it will have a random challenge for to complete, as described in the video below.
Complete the challenge and then head back to the challenge board to see your progress. You may need to complete a second random challenge. Proceed to do so.
There will be a third random challenge that you have to complete. Upon doing so you will then need to ride a dragon back over to the bunker where the Pack-a-Punch machine is located.
Head into the underground bunker where there are several dragon egg incubators. In the center most incubator, you can then place your Dragon Egg inside, as pictured below.
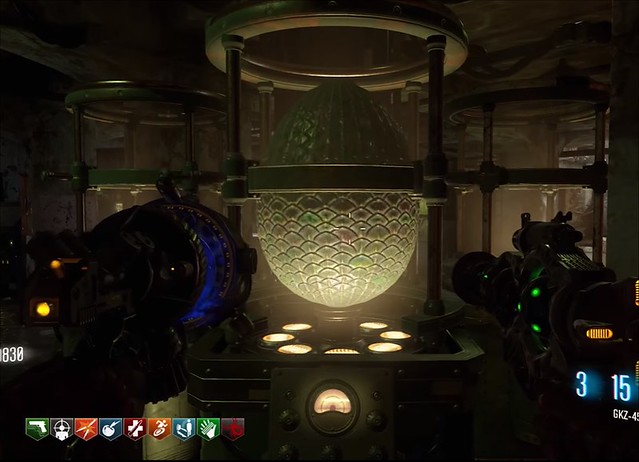
A lockdown sequence will take place and you’ll need to defend the egg by killing the Valkyrie Drones and the zombies. You’ll need to do this for another two rounds until the egg cools down. After completing this specific challenge you’ll need to head back to the challenge board in the graveyard and your reward will be the Gauntlet of Siegfried special melee weapon.
First, after you complete the Pack-a-Punch phase you’ll need to head down into the generator room where the sewer chute is. You’ll need a Valkyrie Drone down there with you and you’ll need to kill the drone right next to a generator in order to power it up. If you did it successfully you should be able to turn it on and it should begin to blow the tarp up indicating that it’s on and the motors are running.
From there, you’ll need to hop into the chute to leave the bunker.
After turning on the generator head back to the main area and you’ll need to find six valves. They look like what’s in the image below, with the numbers ‘1’, ‘2’, and ‘3’ on them.
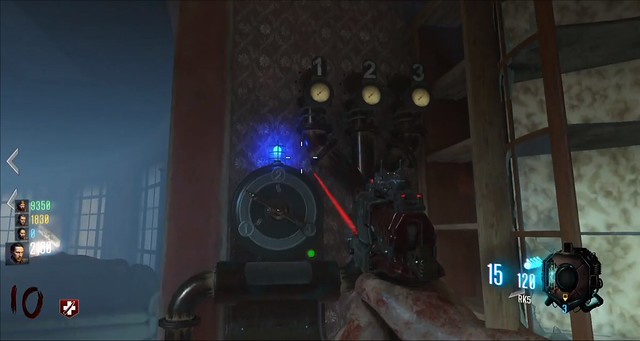
The six valves are located throughout the map. The first is in the department store, another one is at the top of the armory, the third is in the Dragon Command Center, the fourth is in the Supply Depot room behind the stairs, the fifth is in the Tank Station, and the last one is tucked behind a bunk bed to the right of the stairs in the infirmary bunker.
After you powered up the generator some of the valves will be green, some of them will be white and some of them will be lit up blue.
You’ll be able to change the dial on each of the valve stations to direct the airflow to pipes ‘1’, ‘2’ or ‘3’. Different pipes lead to different locations around the map.
The objective is to get all of the valve stations to light up blue.
According to YouTuber jedixking98 the objective is to make a perfect circle of air, but this will randomize each time you play. He explains it in detail at the five minute mark in the video walkthrough guide below.
The main goal is to get each of the locations that are green to switch to blue by messing with the dials. Since this randomizes, your goal will be to find out which valves are connected together. Turning on some valves will turn off other valves. So it’s a classic switch puzzle where turning on one turns off the others but turning off one of the others turns on the rest.
You’ll have to go to each of the six locations and find out which of the valves are connected so that you can get each one to light up blue. You’ll know that air is flowing through them when you hear a hissing sound.
After you get the air flowing through each of the six valves you’ll need to have the air flowing properly so that the the code capsule in the tube can pop out.
According to jedixking98 it’s a lot of trial and error and you have to have specific air flowing through specific pipes to push the capsule through the pipe so you can take it. It’s a random puzzle that changes every single playthrough so it’s not something you can write down and do the same thing every time again.
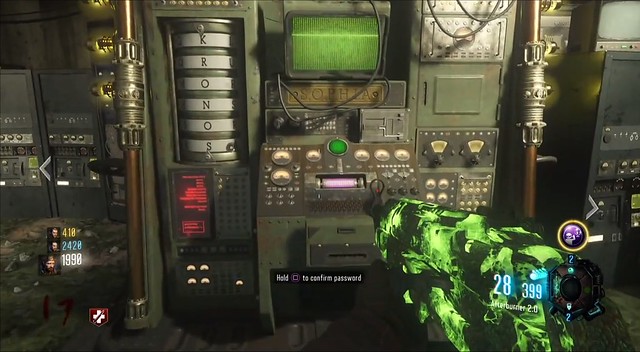
Once you complete the valve puzzle and you get the capsule, insert the capsule into the Sophia computer at the Dragon Command Center. You’ll then have to shoot the password in using the letters on the left side of the Sophia computer station. You’ll need to spell out the password: Kronos.
This will allow you to move on to the next step of the Gorod Krovi challenge.
One of the main elements of the Easter Egg hunt in the Gorod Krovi map in the latest Call of Duty: Black Ops 3 Descent update includes finding all of the trophies. You will need to find six trophies around the map.
Before you can engage in this Easter Egg you’ll have first needed to complete the steps to access the Pack-a-Punch machine and gain access to the bunker and then complete the defense of the bunker and gain access to the Dragon Strike so you can head back. After doing that you’ll need to power Sophia.
In order to power Sophia you’ll need the six trophies. According to MrDalekJD, you can start this particular trophy hunt at around round 4 or 5. He goes through the process of acquiring each of the trophies in the video below.
So, what you’ll need to do is head over to the Supply Depot and there’s going to be a trap in there called the Gigan I-Beam. Activate the trap and a laser will strike into the room and hit the floor. Wait until the trap is completely finished and over by the wall just in front of the steps, there’s a small piece of the floor that will have broken away and underneath there’s a statue/trophy inside. Grab it to complete that segment.
The next trophy is through the Bunker. Head into the chute with the water tunnel and while you’re going through there’s a little red pipe on the ceiling. Shoot the red glowing pipe. It should turn green. If you’re not sure take another trip to make sure it’s green or that you shot it. If you’re successful head back to the bunker and head over to the area with a sink and a toilet. There should be water sprouting up from the toilet and a trophy inside. Grab it.
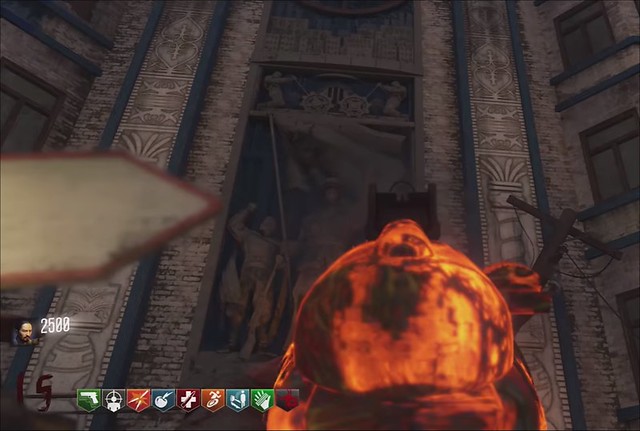
The third statue is outside Dragon Command Central. MrDalekJD suggests aiming and shooting at the statue as indicated in the image below. A piece will drop and it will be the trophy statue.
The fourth trophy is just outside the Supply Depot near the crashed train. Simply use the Dragon Strike on the puddle as indicated in the video above, and the trophy will appear.
In order to get the fifth trophy you’ll need the Gauntlet of Siegfried and you’ll need to melee the safe just before the power room across the steps that lead down into room, and there’s a trophy inside.
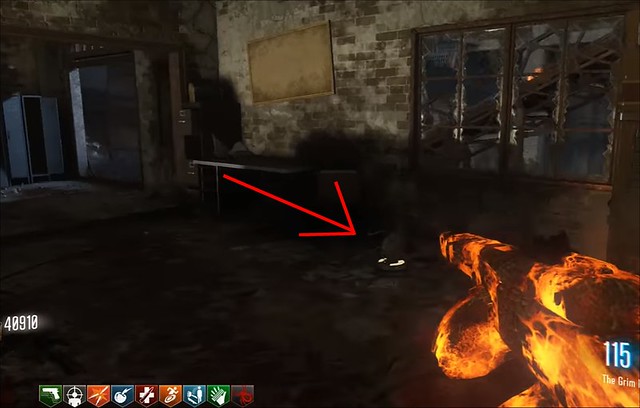
The last trophy can be acquired only after getting the Dragon Shield. You’ll need to use the Dragon Shield melee a large pipe just outside a multi-story building. After meleeing the pipe will sprout out some green gas and will shake the building it’s attached to. On the second floor just inside where you stepped out from, a trophy will have fallen onto the floor just underneath the window, as indicated in the image below.
After getting all of the trophies you’ll be all set and ready to take on another more complex challenge involving re-accessing Sophia the computer.
The Ending
The ending cut-scene managed to go up and out for all to see, with YouTuber JFK Gamer offering the gaming community a look at the two minute cinematic. It features a drunken Nikolai defeated while still in the cockpit of the mech, only to to be gunned down after attempting to pull a fast one with a pistol. Check out the cinematic below.
After collecting the souls, the four zombie hunters manage to open the portal and get sucked up into the sky as the scene fades to black and the words “To Be Continued…” are plastered across the screen, indicating that the Call of Duty: Black Ops 3 zombie campaign is not yet finished.