The campaign mode for Battlefield 1 is a visually splendid masterpiece. Gamers looking to get an idea of what the campaign is like or who need some help in making it through the campaign with ease, there’s a complete gameplay walkthrough available.
Battlefield 1’s campaign is a lot more realistic than the multiplayer mode given that the vehicle physics are a lot more tight and far more weighty than the multiplayer mode. You’ll start the tutorial in a very odd way, playing as countless faceless soldiers who die in unceremonious ways. You can get an idea of what the game starts like with the series of the campaign mode courtesy of YouTuber TheRadBrad. Check it out below.
After completing the tutorial mode where you’re just learning the basics (how long you live and whether you attempt to live is pointless since you’ll die regardless.
The tank segment takes place after the tutorial stage, players will control a British tank driver named Edwards. The mission is not as easy as you might think. You’ll need to play very differently from the multiplayer. The tank is slow and plodding and you’ll need to use cover to avoid being hit by artillery or rival tanks.
Avoid driving in the mud while in control of the tank, otherwise you’ll get stuck and become a sitting duck. Be sure to keep the tank repaired as much as possible because a few good hits and your tank will die.
When facing off against other tanks you can’t tank hits. Use the buildings similar to World of Tanks. In between enemy reloading, peek out and take a shot at the enemy tanks.
You’ll need to compensate long shots due to bullet drop, so aim slightly higher than the target you’re aiming for.
To help with aiming you can position the tank on an incline to get off long-range shots.
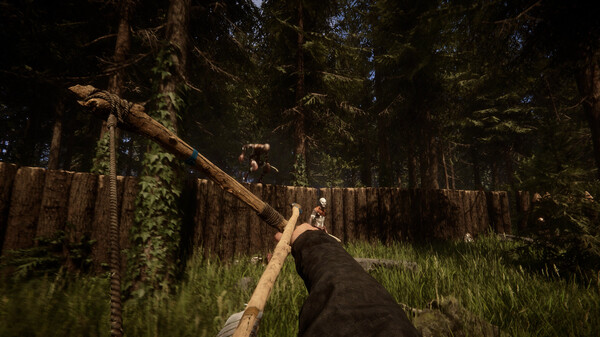
Following the cinematic with the tank getting stuck, you’ll have to scout through the forest and trek ahead of the tank due to a fog obscuring the view.
The campaign is immensely captivating. The second segment involving Edwards sees him scouting through thickets and jungle areas as the small group moves up a ride toward their destination. If you want to avoid taking massive damage and avoid Bess, the tank, getting destroyed, try waiting for them to turn their backs to you while they patrol and stealthily take out the German forces.
Going in guns-a-blazin’ will make things far harder for you than need be, so be sure to take out the guys as quietly as possible.
In the next mission you can silently snipe the German forces, but it’s best to take out the troops who are by themselves to avoid alerting all of them.
You’ll find the necessary spark plugs for the tank in the village.
Take note that if you stay up in the tower and they see you or suspect you’re up there, they’ll fire artillery at the tower and blow it up, so choose your approach carefully.
The next mission is set through the village in the tank, which you can check out below.
While you’re moving through the village, you’ll want to mind your surroundings because it’s easy to get flanked by the multiple tanks. Be sure to avoid going directly into the thick of the battle and use the village as cover to take out each of the tanks.
After clearing the village you’ll need to take out the German artillery at the train yard. There will be some reinforcements at the trainyard that will attempt to flank you, but you can use the houses nearby as cover during the firefight. Time your repairs so that you aren’t out in the open when you need to boost Bess’ life.
After taking out the reinforcement convoy the mission will end and the chapter will be complete.
The next story segment centers around two pilots, including a gambler who takes over and impersonates a British pilot, George Rackham. Jonathan Blackburn, impersonating Rackham, joins up with another pilot named Wilson. MKIceandFire covers the chapter.
The first mission is a tutorial that teaches you how to fly in the planes. You’ll need to tail an allied plane and then test the weapons on the plane by shooting balloons and other targets. You can use the left trigger to zoom in and the right trigger to fire. You can switch weapons using Triangle on the DualShock and ‘Y’ on the Xbox controller.
You’ll need to dogfight some Germans and learn how to repair the plane. You can fix their plane by holding down the left bumper.
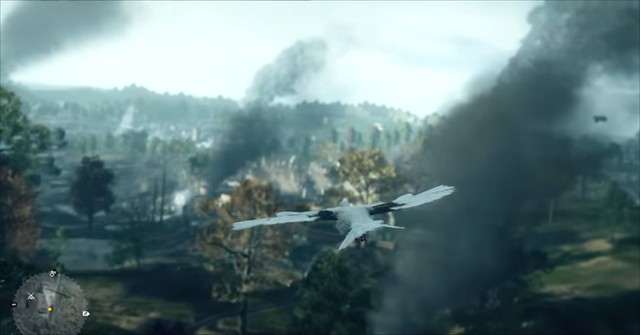
The next mission involves having to shoot down blimps, take out the ground troops and take down the German fortress.
Unlike previous Battlefield games where you land the plane to repair damage, you have to repair while in the air. It’s setup similar to Star Wars: Battlefront. You’ll need to keep the bombers alive while simultaneously dodging enemy fighters.
If you preferred the more tactical aerial physics from Battlefield 2 and Battlefield 3, you can kiss that goodbye. If you liked the physics from Star Wars: Battlefront then you’ll be right at home.
The next mission involves using stealth to take out guards by luring them away from your travel path. You can use the sights on the gun to mark enemies either to sneak around take them out or to sneak past them to get to the exit.
You can actually avoid all of the troops by using the buildings as cover and staying low and out of sight. Inside the first major housing setup you encounter there is a crate with a silenced Mauser inside. It can be used to take out the Germans at a distance.
When you get to the trenches, you’ll find an alarm there that you can disable to prevent the enemy from calling in reinforcements.
The next mission involves carrying Wilson out of a burning plane to the British side of the isle. It’s not a difficult mission and you just have to carry Wilson to safety.
The following mission is both an aerial mission and one that takes place inside of a Zeppelin.The entire path is linear and once you get to the turret gun you’ll need to shoot down the other zeppelin by aiming at the other guns and the cockpit of the Zeppelin.
The next chapter involves the Arditi, a specialist Italian fighting unit during World War I. The mission is an intense battle as players run around in a fully armored suit using a super big-arse gun.
The first mission as the Arditi is classic Battlefield. You’ll need to take out enemy troops and secure St. Anastasia Church.
After you take over the church and defend it, you’ll need to head up the hill and take out the artillery gun.
It’s marked on your map and you’ll need to use anti-tank grenades against the vehicles. Your standard guns won’t work.
The most difficult enemy you’ll encounter on the hill will be flamethrower dudes. You’ll want to keep your distance and aim for their backs, otherwise they will burn the crap out of you.
Once you get to the turret, use it to take down the incoming German planes until you reach the end of the segment.
The next mission involves moving back down the mountain to get to Mateo. You’ll no longer be armored up but you will be able to move faster and utilize a quicker cache of weapons.
When getting through the bunkers you’ll need to head toward the German outpost. You can head around the back or head through the underground bunker. If you head underground you’ll have more closed quarter combat situations to deal with, along with a single flamethrower guy. You’ll need heavy firepower or a lot of grenades to deal with the flamethrower guy.
Once you come out you’ll be surrounded by Germans. It’s best to use a weapon that allows you fire in short bursts to enable you to fire accurate shots.
The next segment involves the Australian front titled “The Runner”. You’ll need to move up through the trenches off the beach.
Despite taking place in the trenches, you’ll actually need to use mid-range weapons for some of the guys. The trench gun shotgun is essential for the up-close and personal fights.
The shotgun is essential for taking over the Overlook base at the top of the hill. Use it to clear out the base and then take it over just like the standard bases in Battlefield.
The next mission involves getting a report to the forward base, however, it’s littered with enemy troops and you’ll need to stealth your way through toward a church which is where the Australians and New Zealanders are holed up.
Once you get to the base you’ll then need to head back to the base for a report. It won’t be easy because enemy troops will be flooding both bases.
After you report back you’ll then need to take on a new mission that involves having to get to rear command, moving along the mountain ridge. There’s a horse you can take to the report but you’ll need to head back into the village to warn the allied forces about the artillery on the troops to cover a retreat. Head back to the church after getting the report and then defend the frontline.
After defending the base you’ll need to head up to Fort Nobet where Foster is supposedly located. Since it’s just you, it’s best to use the binoculars to scout and highlight as many troops as possible before going into the village. If you can use stealth you can actually whittle down their forces before they actually see you.
You’ll need to reach the top of the fort after getting into the fort. Again, stealth will determine how far you’ll get without alerting a whole garrison on your position. Use the lure to draw Ottomans away from you while spotting them out.
The final mission will be holding the top of the base while the British bomb the fort.
The next chapter involves a series of missions involving Lawrence of Arabia. You’ll play as an Arabian spy working against the Ottomans.
Playing as the Arabian spy is all about stealth.
You can pick up some new weapons after killing some of the Ottoman guards, and raiding their dust storms will help cover your tracks for a stealthy approach, or you can go in guns-a-blazin’. Once you clear out the men you can then hop up on top of the train and get inside to cue a cut-scene.
The next mission involves having to raid three different camps to gain control of the birds used to message the iron dragon. You’ll need to take control of each of the camps. How you choose to do so is up to your playing style.