Frogware and Bigben Interactive’s The Sinking City for Xbox One, PS4, and on the Epic Games Store for PC is one of the more highly anticipated titles of the summer. The non-linear detective game is like a mix of Frogware’s previous Sherlock Holmes titles fused with a Lovecraftian storyline. For gamers in need of a little bit of help completing the puzzles, finding clues, and fixing to solve a few cases, there are some gameplay walkthrough guides available for you.
There’s a playlist of videos covering The Sinking City featuring guided commentary from YouTuber ChristopherOdd. You can check out the first part below, covering the Throgmortons and Inssmouthers.
Frosty Welcome Case
The game starts with a cinematic of investigator Charles Reed, having a frightening vision of Cthulhu while traveling on a boat to Oakmont, Massachusetts. Reed heads to Oakmont to find a cure for his visions and ailments – something that other people at Oakmont are suffering from as well.
This sets up the basic premise of why Reed is heading to Oakmont and what he may hope to achieve while there.
The game is light on tutorials, so you’ll need to be wise and smart about how you proceed. If there is evidence in an area and you collect it all, there will be a prompt informing you that you collected all the evidence in that area.

Once the cinematic ends, you’ll be given a first-aid kit and a brick. Grab the gun from the desk. Grab the ammo from the locker, and the camera, along with examining everything else in the room. Open your inventory and use the camera to take a picture of the trophy of the squid on the wall.
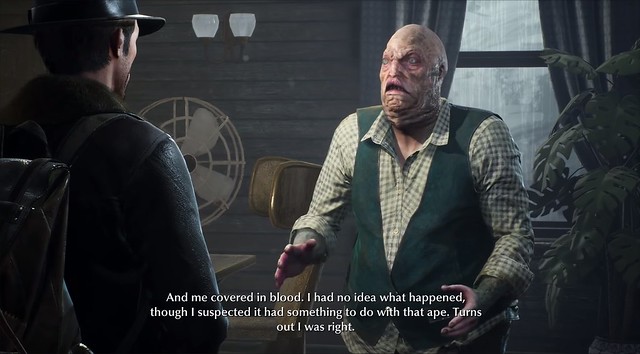
Talk to Johannes. He’ll tell you to head to the Devil’s Reef. Ask him how to get there and he’ll give you a map with a few places of interest marked on the map.
You can get around town either by foot or via boat.
Once you get done talking to Johannes you’ll be given instructions on how to make use of the map and the legends. You can view the map legends below.

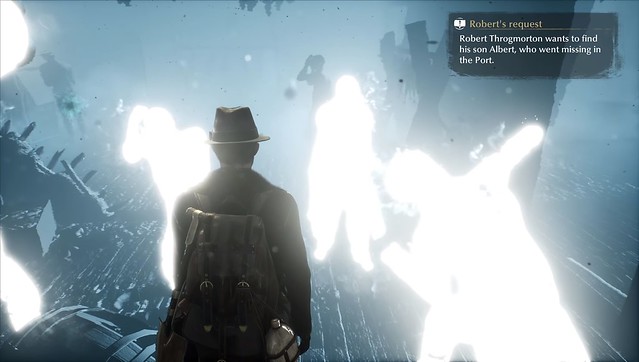
As you walk off the dock you’ll see Throgmorton and you can ask about his missing son.
After Throgmorton explains that the Innsmouthers are dirty refugee scoundrels raising the crime rates and stealing jobs, he strikes a deal with Reed to find his missing son, Albert.
Throgmorton suggests for Reed to go examine the fisherman’s house, as well as the lifeboat that Albert washed shore on.
The tutorial will explain to you how to find and acquire evidence, as well as to place evidence on the map, and how to make use of the evidence you collect.
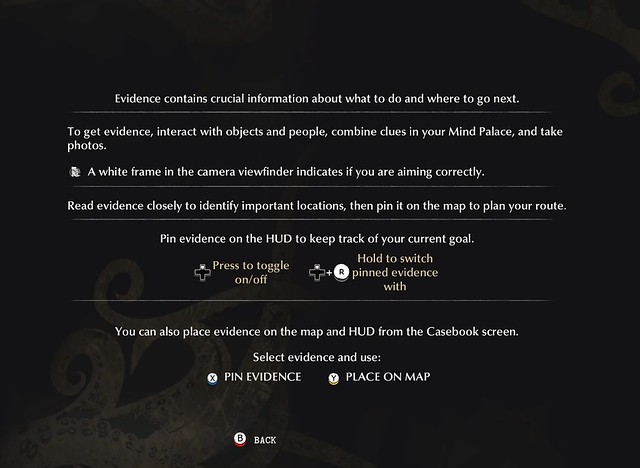
Once you collect enough evidence you can go over the details in the Mind Palace. As you collect evidence you can combine the evidence to make deductions, exactly like in the Sherlock Holmes games when Holmes was able to collect evidence and make deductions to solve the crime.
Once you get done talking to Robert Throgmorton about his missing son Albert, head to Reed’s left (which is due west). Go all the way to the end of the dock and then down to the beach (south). The lifeboat will be located on the beach.
Read Albert’s will and examine the scuba helmet.

Once you get done examining the lifeboat head back up to the dock and enter into the fisherman’s house.
Keep in mind that the game does not have navigation markers or waypoints to help you find locations. You’ll have to pay attention to what people tell you and where you need to go, and then map it out from there. However, you can pin certain quest/case items to your map to help you navigate the city. Simply highlight the evidence/cases and pin them to your map from the inventory screen.
Inside the house, examine the house and head upstairs to talk to the black man, Will Hammond.
When you get done talking to Will, go into the Mind Palace and combine the items about Albert spreading hysteria to all of those around him.
Examine the objects in the house, and look at the picture of the Innsmouther as well as use the Mind’s Eye by pressing up on the digital bad.
You’ll have a limited amount of uses of the Mind’s Eye, which is located in the bottom left hand corner of the screen.
Use the Mind’s Eye on the timepiece on the bed when the distortions appear at the corner of the screen.
You’ll open up the retrocognition effect when you enter into the reality distortion portal. You’ll have to activate all of the events, much like the scene recreations in The Vanishing of Ethan Carter.
There are three scenes to recreate in the room. It starts at the bed, there’s a second in the next room near Will, and then there’s a final scene near the hole in the wall. The sequence should be numbered with ‘1’ in the bedroom, ‘2’ by Will, and ‘3’ by the hole in the wall.
Once you collect all the evidence you’ll be able to piece together the situation using the Mind Palace.
Combine the clues and deduce that Albert was shot, wounded, and fled the house.
Exit the fisherman’s house and use the Mind’s Eye to track down where the specters fled to, which should lead you down the docks and toward the warehouse.
Head inside the warehouse and you’ll find a ripped pocket on the floor near the top of the staircase near a bloodstain. Examine the pocket and there’s a blood-stained note inside from Peter.
In the Mind Palace combine the clues “Albert Fled when wounded” with “Lewis Pursued Albert” to unlock a new clue.
You can also combine the clues “Throgmorton-Inssmouther feud” with “Lewis shot without warning”.

Head downstairs into the storage room and Albert Throgmorton will be found dead inside the room, along with a multi-armed creepy crawler. Make sure you have ammo in your gun – it will take just one shot to kill the monster.
Examine Albert’s dead body and then combine the clues to discover that Lewis may be hiding at the bar in Oakmont Port.
The bar is just on the other side of the warehouse, just in front of the entrance into the bay.
The Under The Keel bar is just to the right of the warehouse if you’re facing away from the warehouse, to the east.
Inside the bar you can talk to the fortune teller.

Talk to the bar owner and explain to him that Throgmorton hired you to find his son. The bartender will give you a key to Lewis’ room.
You’ll find Lewis’ room on the upper floor of the bar.
You can ask Lewis about the murder of Albert, but he’ll deny it, claiming that he wasn’t sure what happened because of some hysteria that spread over him and that he wasn’t himself.
Once you talk to Lewis, you’ll gain the final clues and can then combine them in the Mind Palace.
This will give you the option to either pin the murder on Lewis for deliberately killing Albert, or you can choose to point out that Lewis was under mental influence from the hysteria spread by Albert and killed him unintentionally.
Once you unlock both options and arrive at your conclusion, you must go talk to Throgmorton.
You can either lie to cover for Lewis or you can tell Throgmorton about Lewis’ whereabouts at the bar.
Once the case is complete Throgmorton will instruct you to head to the research institute and he’ll give you a key.
Lost At Sea Case
YouTuber TheRadBrad has the second case in tow.
Once you make your way to the hotel you’ll be able to stay examine the room at the Devil’s Reef.
Inside the hotel you’ll be able to change Reed’s outfit from the ones you unlock as you progress through the game.
Once you exit your room you can examine some of the other rooms throughout the hotel. Once you get done examining the hotel, head downstairs and the hotel manager will give you a side-quest called Letters from Oakmont.
If you’re unsure how to get to the hotel, it’s on your map just beyond the docks between Hubert Ave and Old Colony St. It’s marked on the map below.

You’ll need to make your way north to Hubert St., and Asher Rd., where you’ll need to head to the research center.
You can make a detour at the Oakmont Chronicle to have an interview with Miss Bland, if you want. The Oakmont Chronicle will also work as a hub for collected evidence.
To make your way to the headquarters you’ll need to head to the street mentioned above, but if you have a hard time finding it, you’ll see it marked on the map below.
Go inside the building and examine the expedition notes, the smashed Victrola, and the fisermen reports on the second floor. Examine the expedition samples on the desk, the anthropologist report,
When you get get done examining the clues on the second floor, use your mind’s eye to follow the raven on the ground to the secret wall with the markings on it. Get close to the markings and look at them to head into the next area and follow the raven to the partially burned cargo manifest on the ground.
After you examine everything downstairs head back upstairs and there’s a retrocognition rift you can walk through. Find all of the cognition nodes.
There are four nodes. Start at the top in the back room and make your way downstairs. So ‘1’ starts at the top and ‘4’ is at the very bottom where the fish men are around the barrels. Go into the Mind Palace and combine the clues.
You’ll need to collect more evidence from the Oakmont Chronicle.
You’ll need to choose the burned newspapers for the evidence and select the period after the flood in Grimhaven Bay.
This will unlock the ship freight advertisement.
You’ll then need to make your way down to the docks.
You’ll need to commandeer a boat and head south all the way to the end of the docks at pier 3, as it’s marked on the map.
When you meet with the harbormaster at the pier, he’ll tell you that he’ll help you find Captain Sanders if you get rid of the creatures at the harbor. There are only two small creatures, so either shoot them or use the melee attacks to kill them.
Once you get done killing the beasts go back and talk to the black man.
This will open up a new clue.
Before you leave the pier go back down the pier where the monsters were located and examine the dead bodies and then go aboard the Titania.
Examine all the clues on the boat to gather enough evidence and then when you exit the boat there’s a retrocognition sequence.
The retrocognition starts on the boat with ‘1’ and it ends at the end of the pier with ‘3’ where the one wounded Captain Sanders shoots another crew mate in the head.
Make your way to the hospital, where the wounded man went to get treated for an axe wound.
The hospital is located at the following area on the map.
You’ll need to sift through the archives using the topics: Patients, Surgery, and Grimhaven Bay.
Upstairs you can talk to Pete, one of the patients from the archives who was wounded fishing with dynamite.
You’ll find Captain Sanders upstairs in one of the rooms, masquerading as a Joseph Willow.
Talk to him and confront him about lying, and he’ll spill all the beans.
You can ask Captain Sanders about a diving suit and he’ll give you an address. You can also ask about the ship’s log.
Go into the Mind Palace and connect the wounded sailor with the mad crew to create new evidence.
You’ll also need the log book for the location to Devil’s Teeth. You’ll find the ship’s log in the hospital basement on a shelf. There’s a hole in the hospital’s floor that will take you into the storage area where the ship’s log is located.
To reach the factory where the diving suit is located, take the boat around to C. Smith Ave as it’s marked on the map below.
You’ll need to use a boat to reach the area by moving around and docking at the open part of the diving suit factory.
There are two monsters inside; kill them and then go to the second floor and you’ll find the diving suit. Grab it along with the harpoon gun and you’ll be ready to make the dive where Albert Throgmorton ventured.
Once you get the diving suit make sure you have all the necessary gear and equipment before traveling to Devil’s Teeth. Go back to the docks and down to the pier where the Titania was located.
The ship’s log will open up access to the diving location. You’ll be able to use the harpoon gun while underwater to stun enemies or use the flare gun. Follow the pathway down into the depths and make sure you move toward the harpoon gun and examine it – use the mind’s eye to examine the harpoon gun to unlock a glimpse of the monster eyeing to attack a diver.
Be quick while underwater because the sanity meter will drain quick. Make your way to the light to the enter into the excavation area.
Talk to the crazy survivors to discover what they know.
Examine the area and there’s a retrocognition portal that will open with three points.
The first node is the Innsmouthers at the back of the cave and then the second one is set at the altar while the third one is the middle node.

You’ll unlock all the evidence you need to solve the case. In the Mind’s Palace combine the madness with the survivors and you’ll be able to either choose to save the survivors or abandon.
You’ll also have to photograph all the evidence in the cave, including the Cthulhu statue and the dead Innsmouther on the ground.
In the Mind Palace you’ll also need to combine the remaining evidence to open up the conclusions.

You’ll deduce that the Innsmouthers ambushed the expedition crew and attempted to acquire the artifact and Harriet. Once you combine the clues you’ll open up a new task: to find the ritual artifact and find Harriet.
As you combine the points it will be revealed that Albert was the source of the madness, and that the Innsmouthers had a plot to capture the artifact and Harriet Dough.
Once you finish combining all of these things head back to Robert Throgmorton’s mansion and speak to him about the expedition. You can either choose to inform him that there were survivors or choose to tell him that they all died. When he asks for evidence that the Innsmouthers were involved, make sure you took the photo of the dead Innsmouther for proof that they attacked the researchers.
After you present all of the information to Throgmorton you’ll have completed the case.